How I Built a DIY Arduino Temp Sensor from Scratch (No Modules Allowed)
The summer heat is no joke right now. Instead of buying a standard plug-and-play sensor, I hacked a raw 10-cent thermistor to an Arduino to track the temps in real-time. Here's how it works.
What's up, everyone! If you are anywhere near West Bengal right now, you know the late May heat is absolutely brutal. I wanted a real-time temperature monitor for my desk to track exactly how hot the room was actually getting.
But instead of taking the easy route and plugging in a standard, pre-built temperature module (like a DHT11), I wanted to do it the hard way. I dug into my parts bin, grabbed a raw 10-cent NTC thermistor bead, and wired it directly to an Arduino.
No breadboards. No easy plug-and-play libraries. Just raw hardware hacking. Here is exactly how we made it work.
The Blueprint: Hacking a Voltage Divider
A raw thermistor is basically just a tiny resistor that hates heat. As the room gets hotter, its electrical resistance drops. The problem? An Arduino cannot read "resistance", it can only read voltage.
To fix this, we have to build something called a Voltage Divider.
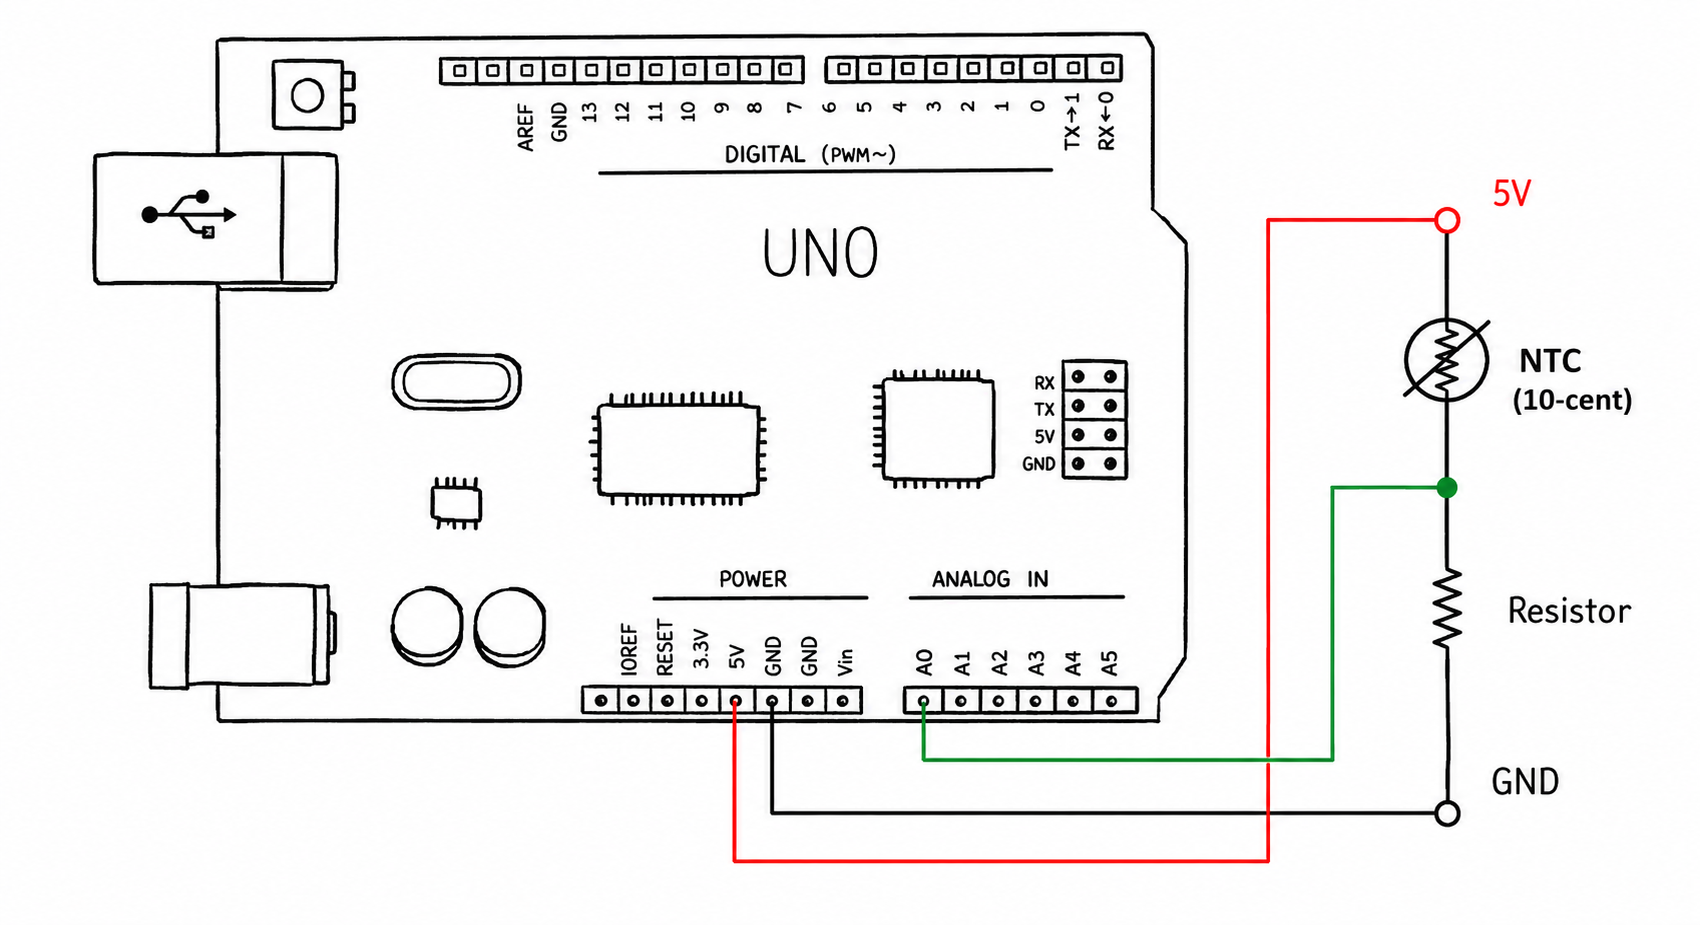
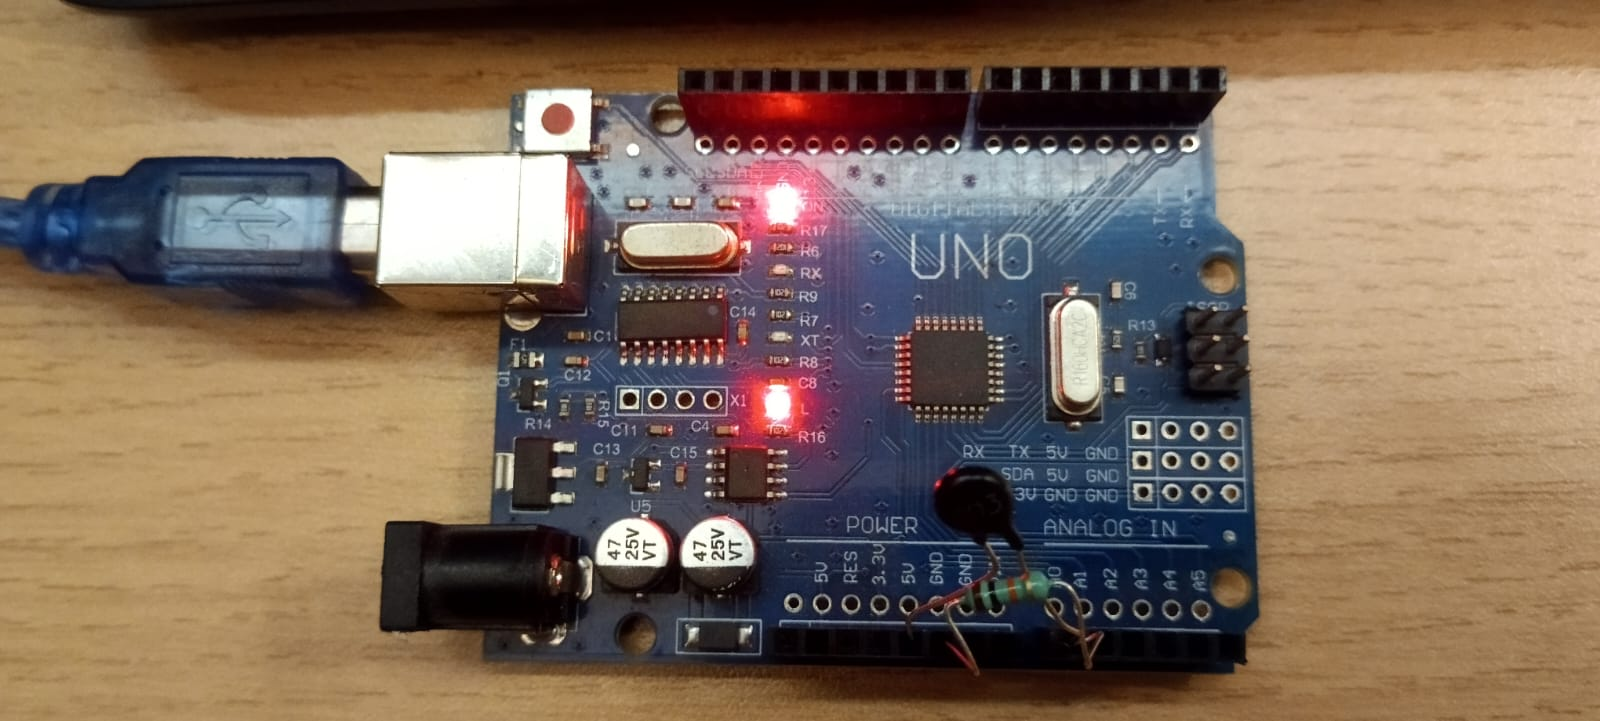
I took a standard 10k-ohm resistor, twisted its metal leg directly together with the 10k thermistor, and shoved them straight into the A0 analog header of the Arduino. By running 5 Volts through this twisted setup, it creates a bottleneck. As the room heats up and the thermistor changes, the voltage passing through the middle shifts. The Arduino reads that shifting voltage, giving us our raw data.
The Code: The Magic Math
Getting a voltage reading is cool, but an Arduino printing "2.5 Volts" to the screen doesn't tell us if we need to turn on the AC. We have to turn that raw electrical signal into Celsius.
Here is the exact code I flashed to the board:
// --- 10k NTC Thermistor Temperature Monitor ---

const int thermistorPin = A0;
const float seriesResistor = 10000.0; // The fixed 10k Ohm resistor

// Steinhart-Hart Coefficients for standard '103' thermistors
const float c1 = 1.009249522e-03;
const float c2 = 2.378405444e-04;
const float c3 = 2.019202697e-07;

void setup() {
  Serial.begin(9600);
  delay(1000);
  Serial.println("--- Boot Sequence Complete ---");
  Serial.println("Live Temperature Feed Starting...");
}

void loop() {
  // 1. Read raw voltage from pin A0 (0 to 1023)
  int rawAnalogValue = analogRead(thermistorPin);

  // 2. Calculate current resistance of the thermistor
  float currentResistance = seriesResistor * (1023.0 / (float)rawAnalogValue - 1.0);

  // 3. Apply Steinhart-Hart equation to get Kelvin
  float logResistance = log(currentResistance);
  float tempKelvin = (1.0 / (c1 + c2 * logResistance + c3 * logResistance * logResistance * logResistance));

  // 4. Convert Kelvin to Celsius
  float tempCelsius = tempKelvin - 273.15;

  // Print to screen
  Serial.print("Current Heat Index: ");
  Serial.print(tempCelsius);
  Serial.println(" C");

  delay(2000);
}
Thermistors are notoriously annoying to code because their resistance does not drop in a straight, predictable line. It drops in a massive, weird curve. If you try to use basic multiplication, your temperature reading will be completely wrong.
Here is how the code fixes that:
The Raw Read: The Arduino's ADC chops the 5V power into 1024 slices. analogRead() grabs that number (between 0 and 1023).
Finding the Ohms: We use Ohm's Law to reverse-engineer the resistance of the thermistor based on how much the fixed 10k resistor dropped the voltage.
The Steinhart-Hart Equation: This is the heavy lifter. It’s a complex algorithm that takes that weird, curved electrical data and mathematically bends it back into a perfectly straight temperature scale.
Once the code processes the raw voltage through that formula, it spits out the exact temperature in Kelvin. Subtract 273.15 from that, and boom, we have a live Celsius reading.
The Result
After flashing the code from my Debian machine (and bypassing some annoying Linux USB port permissions), the serial monitor lit up.
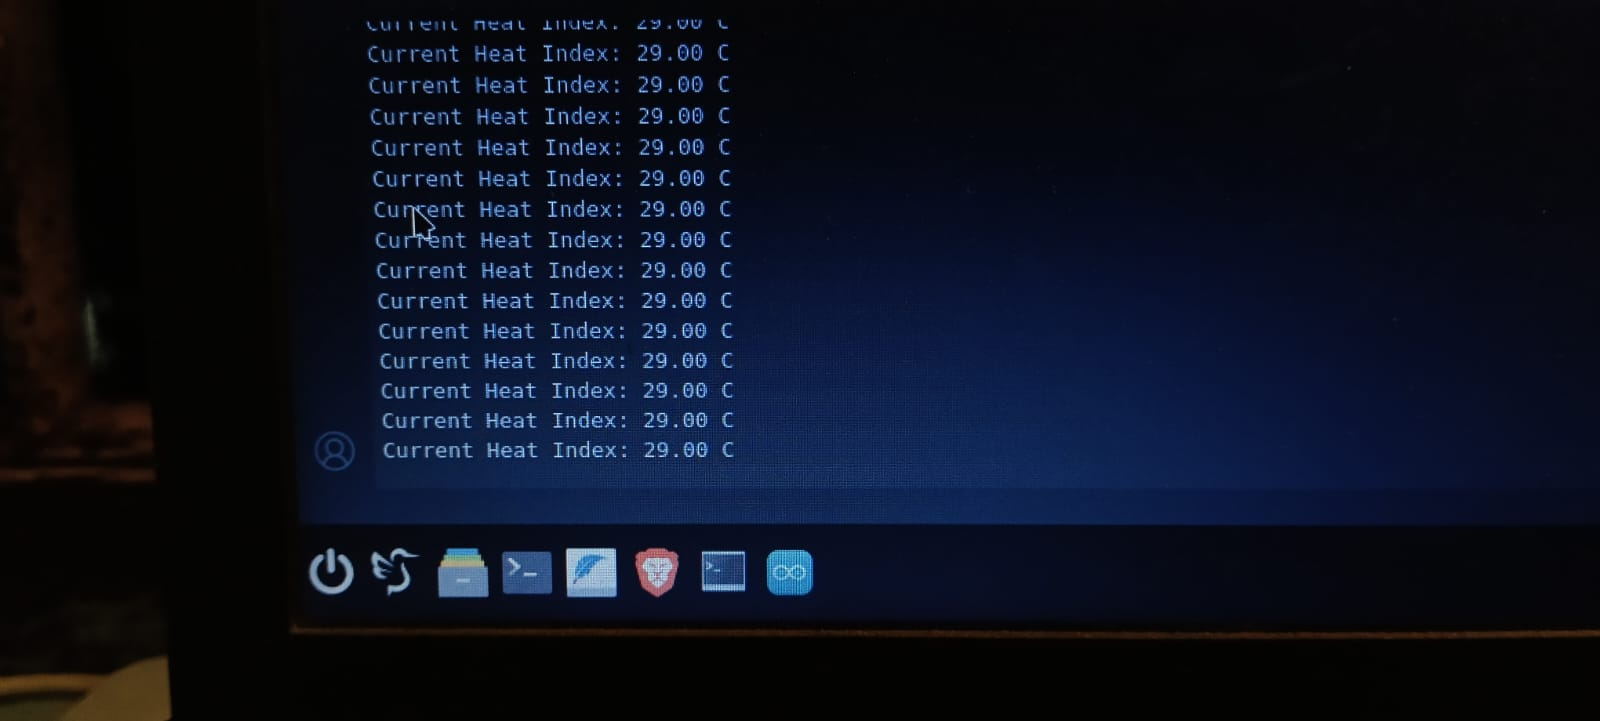
It might not be the prettiest setup, but there is something super satisfying about stripping away all the consumer-friendly abstractions and forcing a raw piece of hardware to do exactly what you want it to do. If you want to really understand the systems you build, you have to know what is happening at the lowest possible level.
Try building this yourself, and let me know what temps you are pulling in your room!